Well I intended on posting about the camera bag I am making for my sister's (late) Christmas present, but it is taking me far longer than I expected (suprise, suprise!). For the last couple of days I have been drafting patterns, falling in love with my rotary cutter and wrestling with bias binding. So to plug the gap I have decided to show you how I created my craft room on a ridiculously tight budget, some help from online and mountains of determination, which went something like this; 'I will have a craft room even if I have no money and have make everything myself!'. So that's what I did, apart from a couple of bookcases I already owned, £10 spent at B&Q and a few things from IKEA, I made my room.
Here is what I started with, a small junk filled room with woodchip on the walls, but it had it's plus points, it gets plenty of natural light and overlooks the garden. I'm sure everyone knows what woodchip wallpaper is, but in case you don't it is the worst wallpaper ever invented, designed to cover even the most terrible walls, that sounds good, right? Wrong, the texture it has really irritates me, I don't know why, I just love nice smooth walls, not ones that are covered in little irregular lumps, it is a nightmare to get of and tiny chips of wood get under your fingernails as you strip it, almost as if it is putting up a fight! But I won the fight, 5 days after starting, a tub of polyfiller (it really does disguise terrible walls), 3 rolls of lining paper and a tin of paint later, ooh nice smooth walls.
But then I had to fill the room with furniture that I didn't have. Luckily I had an old broken wardrobe and my dad kindly donated bits of wood from my brother's old bed. While browsing online for desk tutorials I came across Ana White's website, it's a fantastic website that has tutorials and plans for just about any furniture you want to make, beds, desks, bookshelves, you name it, she can help you make it. All the instructions are free, she estimates how much it will cost and they are all broken down step by step. If you are thinking about making any furniture I'd take a look at this site. So using my stash of power tools (don't you just love power tools? :)), Ana's knowledge and a new found confidence I got to work.
I made the desk, shelves and a shelving unit big enough to fit A2 paper and it also doubles as the 'leg' at the end of the desk, its not quite finished (it only has 3 shelves) but you can see it peeking out from under the desk on the first picture. It's enabled me to store my college work and keep my paper stash flat, when previously it was stood up in one of my cupboards. I love using recycled materials and they no longer look like a wardrobe or a bed thanks to some white spray paint, I now have a large L shaped desk, room for my paper and shelves for my growing collection of art and craft books and crafting supplies. I put up a notice board and a couple of clip boars to keep important information and inspirational images on show. To keep all my pens, pencils, paintbrushes etc organised and handy i used an IKEA rail and hanging baskets, just above my desk.
I used small IKEA spice jars to organise my growing button collection by colour. Now I know exactly where they are when I need them.
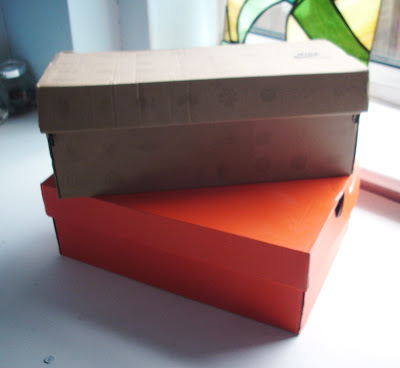
My felting wool, cotton and embroidery thread needed a home and after spending so much time making the room look pretty it seemed a shame to introduce plain old shoe boxes to the room. So I covered them in sheets of wrapping paper. Not only was this inexpensive it also looks great.
Now for the mountain of unorganised fabrics! I found this great tutorial over at Smashed Peas and Carrots (love the name) explaining how to make mini fabric bolts. She uses comic book boards but in the spirit of recycling and keeping costs down, I used several old cardboard boxes cut up into rectangles the right size to fit my shelves and they worked great. Now I have a nice neat fabric stash. I'm still deciding on what to put up at the window, I'm thinking blinds but haven't found the right ones yet.
Right, now I am going to get back to making the camera bag, hopefully I will finish it today so I can show you tomorrow. Wish me luck!
Laura xx


YOU ARE INCREDIBLE!!!!!!
ReplyDelete